Autumn brings a crisp relief after the summer heat, but it also fires the starting gun for critical home care. Leaves turn color, temperatures plunge at night, and before long, the first hard freeze arrives. For homeowners, this shift in seasons is far more than a aesthetic change; it is a vital window of opportunity. Ignoring minor home repairs during the mild autumn months almost always leads to costly emergency fixes when winter hits full force.
Water is a home’s greatest enemy, especially when it freezes. A tiny trickle through a damaged roof tile or a clogged downspout can quickly transform into a massive ice dam, causing water to back up directly into your living room ceiling. Unprotected pipes freeze and burst inside walls, while unserviced heating systems quit on the coldest night of the year, leaving families scrambling for emergency repairs at peak rates. Taking a proactive approach to seasonal maintenance isn’t just about preserving your property—it is one of the smartest financial decisions you can make as a homeowner.
Preparing your home for cold weather requires a systematic approach. By breaking down tasks into focused exterior and interior projects, you can systematically eliminate draft points, secure your roof, safeguard your outdoor plumbing, and ensure your heating system operates cleanly and efficiently all season long.
Protecting the Roof and Overhead Elements From Winter Damage
The overhead structure of your home takes the brunt of winter’s punishment. Snow loads, pounding freezing rain, and high wind gusts constantly test the integrity of your shingles, flashing, and exterior fixtures. Catching vulnerabilities before the first snow falls is essential because repairing an active roof leak in sub-zero weather is both dangerous and extraordinarily expensive.
Inspecting Shingles, Flashing, and Overhangs
Begin your roof evaluation from the ground using a pair of high-powered binoculars. Look closely for shingles that are cracked, curled, cupped, or completely missing. Pay special attention to the valleys of the roof where different slopes meet; these areas funnel massive volumes of water and are prime locations for leaks. Inspect the metallic flashing around chimneys, skylights, and plumbing vents. Flashing should lay flat and tight against the structure. If you spot dried out, cracked caulk or rusting metal around these penetration points, water will inevitably find its way inside once snow sits on the surface and begins to melt.
While examining the upper levels of your home, do not overlook attached structural accessories. Fabric window coverings, patio shade structures, and retractable awnings require specific end-of-season care. Leaving canvas or vinyl extended during a heavy snowstorm can bend metal support arms or tear the fabric entirely under the weight of wet snow. Clean these fabric covers thoroughly with mild soap and water, let them dry completely to prevent mold growth, and store them in a dry space or secure them tightly in their protective winter casings.
Determining When Professional Intervention Is Required
While many minor roof checks can be handled from the safety of a ladder, certain warning signs require advanced technical skills and specialized equipment. If you notice sagging along the ridge line, spongy decking beneath your feet, or widespread loss of protective asphalt granules in your downspouts, simple DIY patching will not suffice. Major structural compromises require an experienced roofing service to evaluate the structural integrity of the trusses, replace damaged underlayment, and ensure the entire system meets local load ratings before winter storms hit.
When completing your fall roof and overhead safety checklist, be sure to scan the roof surface with binoculars for missing shingles, inspect chimney and vent flashing for rust or cracked caulk, clean and dry all fabric window awnings, check the attic space for light leaks or water stains, and schedule a professional inspection if any sagging is present.
Rerouting Autumn Water to Safeguard Your Home Foundation

When torrential fall rains hit, your home’s water diversion system must work at peak performance. Water pooling around your foundation during autumn turns into expanding frost-heaves come winter, cracking concrete footings and pushing dampness into basements. Managing water flow effectively requires maintaining a clean, unbroken path from your roof deck down to the soil drainage discharge points.
Imagine a typical autumn weekend. A sudden rainstorm hits after weeks of falling oak leaves. You walk outside and notice water cascading over the side of your roof like a waterfall, pouring directly onto the soil next to your basement wall. Upon closer inspection, you realize the gutters are completely packed with rotting leaves, and the old aluminium joints have split open from the weight. This exact scenario plays out for thousands of homeowners every year, turning a simple maintenance task into a foundation repair bill running into the thousands.
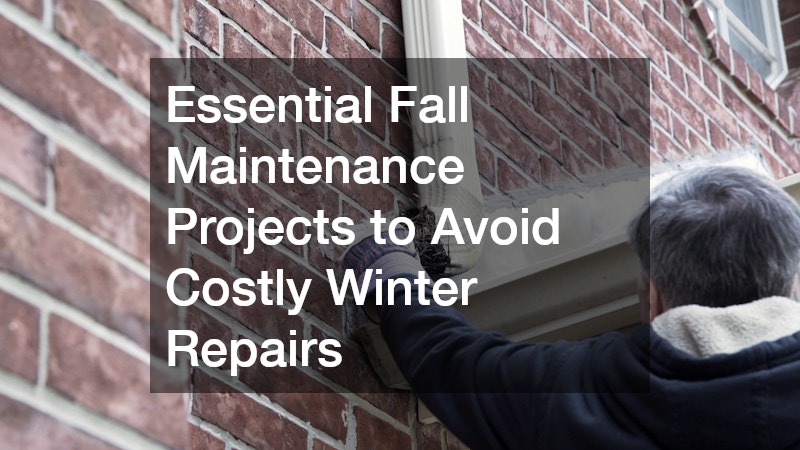
To avoid this outcome, clear out all organic debris manually or with a high-pressure hose, ensuring the drop outlets leading into the downspouts are entirely unobstructed. Flush the downspouts with water to verify that runoff discharges at least five feet away from the foundation wall.
If your current gutters show signs of severe structural wear, such as pervasive rust, missing hanging brackets, or chronic leaks at the joints, continuous maintenance becomes a losing battle. Sectional gutters naturally weaken over time because every connection point represents a potential leak path. When section seams fail, water drips down fascia boards, rotting the wood framing behind the metal.
Upgrading your system with the help of a certified gutter company eliminates these weak links entirely. Modern continuous systems like seamless gutters are custom-fabricated on-site to match the exact dimensions of your home, providing a sleek appearance and superior water delivery. Investing in a professional gutter replacement ensures that heavy rain and melting snow are carried safely away from your structure, protecting your home’s structural foundation for decades to come.
Winterizing Yard Equipment and Outdoor Water Amenities

Preparing the grounds surrounding your home is just as vital as protecting the main house. Exterior water lines, irrigation systems, and outdoor leisure structures are exceptionally vulnerable to sudden temperature drops because they sit directly exposed to freezing soil and air.
Step-by-Step Irrigation and Outdoor Water Shutdown
- Isolate the main water line: Locate the primary indoor shutoff valve that controls water supply to all exterior spigots and irrigation manifolds, then turn it to the closed position.
- Open outdoor bibs: Open all exterior hose bibs completely to allow trapped water to drain out. Leave them open throughout the winter to prevent pressure buildup.
- Connect an air compressor: Attach a medium-duty air compressor to the main blow-out port of your irrigation manifold using a quick-connect hose adapter.
- Purge the zones systematically: Set the air compressor regulator to a safe pressure (typically below 50 PSI for plastic piping) and open each zone valve one at a time, forcing compressed air through the pipes until only a fine mist exits the spray heads.
- Drain underground lawn sprinklers: Ensure all low-point drain valves across the sub-surface lines of your lawn sprinklers are manually opened to clear any low-lying water pockets.
- Disconnect hose attachments: Store all garden hoses flat inside a heated garage or basement to prevent the rubber from cracking during freeze cycles.
Securing Pools and Hardscape Features
Outdoor swimming facilities and surrounding concrete features require dedicated closing protocols to prevent massive structural damage from expanding ice.
Properly preparing a swimming pool installation for the winter months involves far more than simply throwing a tarp over the water. You must start by balancing the water chemistry, adjusting the pH, alkalinity, and adding winterizing shock. Next, lower the water level below the skimmer line, blow out all filtration lines, and insert freeze plugs. Finally, install a heavy-duty, tension-anchored safety cover. Failure to clear plumbing lines can cause internal PVC pipes to burst underground, leading to complex excavation repairs come spring.
Finally, turn your attention to stone patios, walkways, and concrete driveways. Sweep away dead leaves and debris, then inspect the surface for small cracks. Fill any visible gaps with a flexible, exterior-grade masonry sealant. When water seeps into unsealed concrete cracks and freezes, it expands with immense pressure, popping the surface and turning minor fissures into wide, dangerous hazards by spring.
Upgrading Heating Systems and Maintaining Indoor Air Comfort

When the temperature drops outside, your home’s heating systems become the central pulse of household comfort. Running a furnace, boiler, or fireplace without proper autumn maintenance is both energy inefficient and a potential safety hazard. Dust accumulation, worn ignition components, and blocked flues can transform a cozy heating element into a carbon monoxide risk or a sudden breakdown in the middle of a blizzard.
Maximizing Mechanical Heating Performance
Your primary heating plant works harder than almost any other appliance in your home during late autumn and winter. Before cranking the thermostat up for the season, replace all air filters with fresh, high-MERV-rated replacements. Clogged filters force the blower motor to work significantly harder, dramatically reducing air flow and driving up monthly utility bills. Vacuum out floor registers, clear dust from cold air returns, and ensure furniture or drapes are not blocking heat registers.
While homeowner maintenance like filter changing is essential, internal mechanical components require specialized diagnostic equipment. Scheduling seasonal tune-ups with qualified HVAC contractors ensures that your burner assemblies are burning clean, heat exchangers are free of dangerous hairline cracks, ignition controls function reliably, and system thermostats are calibrated accurately. Professional technicians can identify minor electrical wear or failing fan belts long before they cause a total system shutdown during a sub-zero cold snap.
Preparing the Hearth for Safe Winter Operations
A wood-burning or gas hearth offers unparalleled warmth and ambiance during cold autumn nights, but it demands careful safety checks before lighting that first fire of the season.
Before igniting a fire, start at the top by checking the chimney cap and spark arrestor. Moving down, perform a flue liner inspection to check for creosote build-up. Next, perform a damper check to verify that it opens and closes smoothly, forming a tight seal when closed to prevent warm indoor air from escaping up the chimney when the hearth is not in use. Finally, check the firebox integrity and inspect the refractory brick for cracks or missing mortar.
Creosote is a highly flammable byproduct of wood combustion; if it accumulates to a thickness of an eighth of an inch or more, it presents a severe chimney fire risk. Clear out all old ash from the firebox, leaving a thin half-inch layer at the base to insulate future embers. Repair minor brick cracks with refractory mortar to prevent extreme heat from reaching structural wall framing behind the unit. Keep a dedicated set of fireplace tools nearby, verify that your fire extinguisher is fully charged and unexpired, and ensure carbon monoxide detectors are installed on every level of the home, particularly near sleeping quarters.
Sealing the Building Envelope and Controlling Interior Moisture
Drafts and uncontrolled interior moisture can make a warm house feel cold, dry, and uncomfortable while quietly driving up heating expenses. The main goal during late autumn is to create a tight thermal envelope around your living space. This involves sealing cracks where cold outdoor air leaks into your home and controlling interior moisture levels so condensation does not rot window sills or encourage mold growth in hidden cavities.
Stopping Air Leaks Along Exterior Perimeter Walls
Air infiltration accounts for a massive percentage of heat loss in residential homes during the winter. Cold air pulls into the lower levels of a house through tiny gaps around windows, doors, and utility penetrations, while warm air escapes out through the attic—a process known as the stack effect.
To break this cycle, conduct a simple draft test on a windy autumn day. Move a lighted incense stick or candle slowly around the perimeters of window frames, exterior door frames, electrical outlets on exterior walls, and attic access hatches. If the smoke flickers or blows horizontally, you have found an active air leak.
- Door and Window Perimeter Seals: Apply fresh exterior-grade silicone caulk along fixed window joints and install heavy-duty vinyl weatherstripping inside door jambs.
- Threshold Sweeps: Install adjustable door sweeps at the base of all exterior doors to seal gaps between the door panel and the threshold.
- Utility Penetration Points: Fill larger gaps where plumbing pipes, gas lines, or electrical conduits pass through exterior walls using expanding polyurethane spray foam.
- Attic Hatches: Glue rigid foam board insulation to the top side of your attic access door and install foam tape around the resting lip.
Controlling Interior Bathroom Moisture and Drafts
While sealing the exterior of your home keeps cold air out, managing humidity levels inside moisture-heavy rooms like bathrooms becomes critical during cold weather. During winter, high indoor humidity collides with cold window glass and cool exterior walls, creating heavy condensation that drips down surfaces, destroys paint, and rotted wood trim.
Bathrooms require special attention during fall weatherization because hot showers create massive humidity spikes in spaces with cold exterior walls. Inspect the rubber sweeps, magnetic seals, and perimeter framing around glass shower doors to ensure water and steam are contained within the shower enclosure. Damaged or missing seals allow hot water spray to pool onto cold tile floors, while letting humid air escape freely into uninsulated wall cavities. Replacing cracked seals and recaulking around the base of enclosure tracks prevents structural subfloor rot and keeps warm, humid air contained where it can be handled efficiently by your home’s exhaust fans.
Finally, check all exhaust fan vents leading out of bathrooms and kitchens. Ensure the exterior vent flaps open freely when the fan is running but snap tight when the fan is turned off. A stuck open vent flap acts as an open window, allowing cold air to blow straight into your home all winter long.
Protecting Property Value Through Systematic Autumn Care
Taking the time to systematically work through a comprehensive fall maintenance plan is one of the single most rewarding investments you can make in your home. By inspecting your roof, clearing and upgrading your water drainage networks, winterizing outdoor amenities, tuning your primary heating systems, and sealing drafts across interior living spaces, you create a resilient defense against the harshest winter weather.
The money and time spent on simple autumn maintenance pay immediate dividends through lower monthly utility bills, extended lifespan for critical home appliances, and total peace of mind when winter storms roll in. Do not wait for the first severe freeze to discover a broken pipe or a failing heating unit. Grab your tool bag, print out your checklist, and secure your property today—your future self will thank you when you are sitting warm, cozy, and worry-free all winter long.