As the vibrant colors of autumn begin to fade and the first frost settles on the grass, homeowners are reminded of the inevitable approach of winter. For many, the seasonal drop in temperature brings a corresponding and often painful spike in utility bills. The hidden cost of the cold is staggering; billions of dollars are wasted annually across the country as expensive, artificially heated air escapes through poorly sealed building envelopes. True home efficiency is not simply a matter of tossing a few extra rolls of fiberglass into the attic and calling it a day. Instead, it requires a holistic approach, viewing your house as a complex ecosystem consisting of the thermal envelope, mechanical heating systems, plumbing infrastructure, and daily living habits. When one part of this system is compromised, the entire home suffers from drafts, cold spots, and excessive energy consumption. Consider the following strategies for fortifying every vulnerability in your home before the harsh winter weather arrives. By addressing exterior barriers, roof systems, entry points, and mechanical equipment, you can create a resilient, comfortable sanctuary that defies the bitter cold outside while keeping your energy expenditures firmly under control all season long.
Identify and Seal Micro-Cracks Along the Foundation and Exterior Walls

The exterior shell of your house takes the absolute brunt of winter weather, serving as the primary shield against freezing winds, driving sleet, and sub-zero temperatures. Before looking inward, it is critical to evaluate and reinforce this outer barrier. Even the smallest micro-cracks along the foundation and exterior walls can invite significant drafts that undermine your internal heating efforts. A highly effective method for identifying drafts is the flashlight test. Have a partner stand outside at night and shine a flashlight along the foundation and window frames while you observe from the interior; wherever you see light piercing through, cold air will follow.
Once you identify these vulnerabilities, you must take immediate action to seal them against the elements.
- Clean out any dirt or debris from the cracks using a stiff wire brush to ensure your sealing materials adhere properly to the masonry or wood.
- Apply exterior-grade silicone caulk to cracks smaller than a quarter-inch, ensuring a flexible, waterproof seal that can expand and contract with severe temperature fluctuations.
- For larger masonry gaps, utilize expanding polyurethane foam, which actively expands to fill irregular voids and creates a formidable thermal barrier against the wind.
Beyond micro-cracks, evaluate the overall structural integrity of your home’s outer shell. If your exterior cladding is warping, rotting, or pulling away from the sheathing, patching might not be enough. Addressing degraded exterior materials through professional siding installation can dramatically improve the building’s thermal envelope and wind resistance, acting as a massive winter coat for your property. Additionally, do not underestimate the power of strategic landscaping. Planting dense, evergreen shrubs about twelve to eighteen inches from the walls creates a natural windbreak. This vegetation traps a layer of dead air against the house, which serves to insulate the lower walls from the biting, freezing winds that would otherwise strip heat directly from the masonry.
Measure and Upgrade Your Attic Insulation and Inspect Your Roof

Because heat naturally rises, a poorly insulated attic is a major culprit for winter energy loss. The warm air you generate will effortlessly drift upward, seep through your ceiling, and vent into the freezing sky if not blocked by a robust thermal barrier. The first step in stopping this upward loss is to measure and upgrade your attic insulation to match modern standards.
- Take a ruler into your attic and measure the depth of your current insulation; depending on your climate zone, you generally want between twelve and twenty inches of coverage to achieve the recommended thermal resistance.
- Consider adding blown-in cellulose over existing layers, as it settles into tight corners and covers ceiling joists better than unfaced fiberglass batts, virtually eliminating thermal bridging.
- Ensure that your soffit and ridge vents remain completely unblocked; proper attic ventilation is necessary to keep the space cold, which paradoxically protects your home during the winter.
If your attic becomes too warm, escaping heat will melt the snow resting on your roof. This melted water trickles down to the colder eaves and refreezes, creating what is known as an ice dam. Ice dams force subsequent snowmelt to back up under your shingles, tearing apart materials and causing devastating internal leaks. To prevent this, you must inspect your shingles and flashing proactively. Look for loose shingles, deteriorated chimney flashing, or compromised vent boots. Addressing these issues with prompt roof repair before the snow flies will save you thousands of dollars in water damage restoration. Because assessing an icy roof is incredibly dangerous for the average homeowner, it is highly recommended to schedule a pre-winter inspection with a reputable roofing company to identify structural vulnerabilities, ensure proper ventilation, and confirm that your home’s topmost shield is ready for the seasonal onslaught.
Apply High-Performance Weatherstripping and Layer Thermal Barriers
Windows and doors represent massive, deliberate holes in your home’s thermal envelope. Even if closed and locked, aging glass and worn-out frames provide a superhighway for heat loss. Up to thirty percent of residential heating energy is lost through inefficient windows and doors. The most immediate defense against this loss is applying high-performance weatherstripping to all moving joints. Over time, original factory weather seals compress, dry rot, and crack, rendering them useless against winter gusts.
To properly seal these entry points, follow a systematic approach to weatherstripping:
- Scrape away all old adhesive, flaking paint, and degraded foam from the window sashes and door jambs using a putty knife and rubbing alcohol to ensure a perfectly clean surface.
- Install V-strip weatherstripping along the sides of double-hung windows; this material folds over itself to create a tight, friction-free seal that stops drafts without impeding the operation of the window.
- Apply thick adhesive foam tape to door frames and attach heavy-duty, screw-on door sweeps to the bottom thresholds to block air from sweeping across your bare floorboards.
Beyond the frames, the glass itself acts as a massive thermal bridge. Glass is a remarkably poor insulator, and cold windowpanes will literally pull heat out of your living spaces while creating uncomfortable convective air loops that make the room feel much colder than the thermostat indicates. You must layer thermal barriers directly over the glass. Installing heavy-duty cellular shades or insulated, thermal-lined window treatments to trap a pocket of dead air between the warm room and the cold glass is one of the most effective ways to reduce convective heat loss. By closing these heavy fabrics at dusk, you lock in the heat generated during the day and block the chill of the long winter night. By taking the time to address these transparent thermal bridges, you create a much more comfortable environment.
Insulate Shared Walls and Upgrade the Primary Garage Barrier
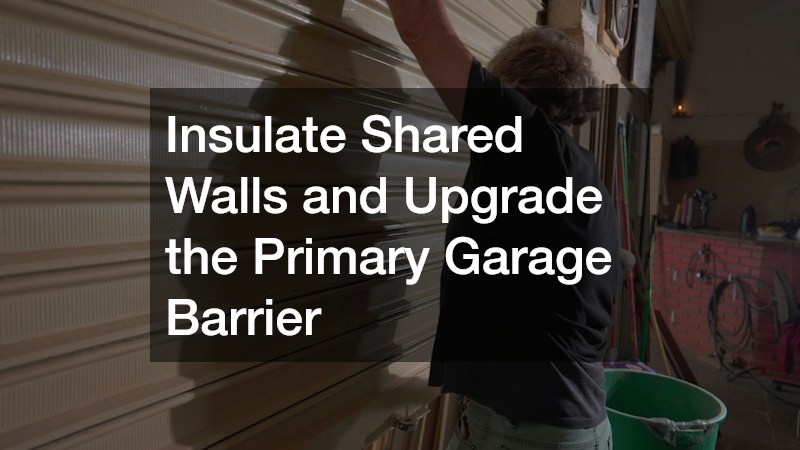
The garage is often the most neglected area when it comes to winterizing, yet it is typically the largest opening in the entire structure. An attached, uninsulated garage acts like a giant refrigerator bolted directly to your living space, constantly siphoning heat through shared walls and ceilings. Securing this massive space is paramount for whole-house efficiency. First, you must insulate any shared boundaries. If you have bedrooms situated directly above the garage, or a living room sharing a wall, that drywall must be meticulously air-sealed and packed with high-density insulation.
- Check for gaps around electrical outlets, light fixtures, and plumbing penetrations on the shared garage wall, sealing them tightly with fire-rated expanding foam to block air transfer.
- Consider installing rigid foam board insulation over the exposed garage ceiling to add an extra layer of defense for the living spaces situated directly above.
The most critical factor, however, is the primary barrier blocking the sub-zero outside air. A thin, uninsulated metal door transmits freezing temperatures rapidly indoors, essentially offering no resistance to the elements. Upgrading to a multi-layer polyurethane insulated model via full garage door replacement offers immediate energy savings and drastically raises the ambient temperature of the space. Even if you have a decent door, the perimeter seals must be flawless. Ensure the rubber bottom threshold seal is supple and free of cracks, and check the side tracks for daylight. Bringing in a professional for routine garage door services can adjust the tension springs, lubricate the rollers, and recalibrate the track alignment to ensure the door presses flush and creates an airtight seal against the concrete floor every single time it closes. Taking the time to focus on this large structural opening yields incredible dividends for your winter comfort.
Schedule Preventative Maintenance and Calibrate Your Fuel Supply

All the insulation in the world will not keep you comfortable if the mechanical systems generating your heat are failing, inefficient, or improperly calibrated. Preparing your heating equipment for peak performance is a non-negotiable aspect of winter preparation. The core of this preparation involves preventative maintenance and optimizing the airflow throughout your home’s ductwork. A suffocated furnace works twice as hard to produce half the heat, costing you heavily in both energy bills and system degradation.
- Replace your furnace filters every single month during peak heating season to prevent blower motor strain and ensure clean air is circulating without restriction.
- Vacuum out all floor registers and ensure that heavy furniture, thick rugs, or long curtains are not blocking the supply and return vents, which can disrupt the system’s pressure balance.
- Check your thermostat programming to guarantee you are not unnecessarily blasting heat when the house is empty or when everyone is asleep under heavy blankets.
While DIY maintenance is crucial, the complexity of modern heating systems requires professional oversight. You should always bring in a certified HVAC company for an annual tune-up to thoroughly clean the burners, test the electrical draws, check the heat exchanger for dangerous cracks, and calibrate the system for maximum combustion efficiency. Furthermore, you must calibrate your fuel supply for peak winter performance. If your home operates off the natural gas grid, monitoring usage rates and setting up automatic delivery schedules will prevent the nightmare scenario of running out of fuel during a severe cold snap. For oil-burning systems, utilizing high-efficiency, clean-burning blends of home heating oils to reduce soot buildup in the combustion chamber can significantly improve the heat transfer rate and extend the overall lifespan of your boiler or furnace.
Wrap Exposed Pipes and Flush Your Domestic Hot Water Source
While we typically associate winter insulation with personal comfort and energy savings, insulating your plumbing infrastructure is purely about preventing catastrophic damage. When water freezes, it expands with immense hydraulic pressure—pressure that easily shreds copper, CPVC, and PEX piping. A burst pipe can pump hundreds of gallons of water into your home in minutes, causing tens of thousands of dollars in structural damage.
- Map out your home’s plumbing network, paying special attention to unheated zones such as basements, ventilated crawlspaces, unheated garages, and exterior walls.
- Measure the diameter of these vulnerable pipes and purchase corresponding foam pipe insulation sleeves from your local hardware store.
- Cut the sleeves to length, wrap them around the exposed pipes, and secure the seams tightly with heavy-duty duct tape or zip ties to ensure no cold air can penetrate the foam barrier.
If you have lines that have repeatedly frozen in past winters despite your best insulation efforts, it is wise to act preemptively by consulting a residential plumber to reroute those highly vulnerable lines deeper into the heated envelope of the house. Beyond the pipes themselves, you must optimize your domestic hot water source. Over the course of a year, sediment from hard water builds up at the bottom of the tank. This sludge acts as an insulator between the heating element and the water, forcing the burner to run longer and hotter while wasting massive amounts of energy. Carefully drain a gallon of water from the bottom valve to clear out this sediment. Afterward, wrap the unit in a specialized fiberglass insulation blanket to reduce standby heat loss. However, be vigilant; signs of severe tank corrosion, pooling water, or faulty pressure valves require immediate water heater repair to ensure your winter safety and prevent a dangerous malfunction.
Achieving efficient insulation against the seasonal cold is not a single, isolated task, but rather a comprehensive, home-wide campaign. By methodically wrapping your exterior, blocking upward heat loss, sealing glass entry points, securing large utility spaces, optimizing mechanical output, and armoring your plumbing, you create a powerful, compounding effect on your overall energy savings. This holistic approach ensures that every dollar spent on heating directly contributes to your family’s comfort, rather than leaking out into the freezing atmosphere. Beyond financial benefits, executing these protective measures drastically improves your indoor air quality, eliminates frustrating cold spots, and extends the lifespan of your critical home systems. Do not wait for the first blizzard to reveal the flaws in your home’s thermal envelope. Tackle this checklist deliberately, perhaps dedicating one weekend to each major area, starting with the most vulnerable zones. Taking action now will guarantee a warm, resilient, and entirely stress-free winter season for you and your household.